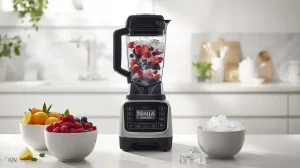
What Is a Ninja Blender Touch Screen?
A ninja blender with touch screen uses a flat, digital panel instead of old-school buttons. In simple terms, you tap icons on the screen to blend, pulse, or crush ice. The screen lights up only when the pitcher is locked in, which keeps things safe and foolproof. It feels natural – like using your phone – rather than learning a complicated appliance.
The biggest difference between a touch screen ninja blender and a button model is how clean and easy it feels. Buttons can trap spills and crumbs, while a smooth screen wipes clean in seconds. From my experience, that alone makes daily use less annoying. It’s also faster to choose a setting because everything is clearly labeled on one screen.
What really sets Ninja apart is the Ninja Auto IQ Touch Screen Blender System. Auto-iQ programs think for you by using timed pulses and speed changes. In short, you press one button and let the blender handle the rest. I rely on this when I’m half awake and just want a smoothie that comes out right.
Several Ninja models now use this touchscreen design, including pro and smart kitchen systems. These blenders combine power with simple controls, which is why they’re popular with beginners and busy households. If you want tech that helps instead of getting in the way, this design hits the sweet spot.
How to Turn On a Ninja Blender Touch Screen (Step-by-Step)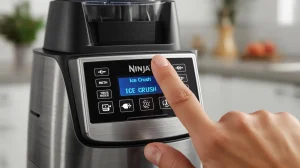
Plug it in, lock the pitcher, and the screen will light up automatically.
That’s the step most people miss when learning how to turn on a Ninja blender touch screen.
First, make sure the blender is plugged into a working outlet. Ninja blenders don’t have a traditional power button, which can feel strange at first. I remember thinking mine was broken the first time. In reality, the touch screen stays dark until the blender is assembled correctly.
Next, lock the pitcher firmly onto the base. This safety lock is key. Once the pitcher clicks into place, the touch screen turns on by itself. This design prevents accidents and keeps the blender from running when it’s not ready. If the screen is dark, nine times out of ten, the pitcher isn’t seated all the way.
Finally, give the screen a second to wake up. The touch panel doesn’t always light up instantly, especially on first use. This is normal and part of the Ninja Blender touch screen instructions. Once it’s active, you’ll see the Auto-iQ options and manual controls appear, ready for your next blend.
How to Use a Ninja Blender with Touch Screen (Beginner-Friendly Guide)
Lock the pitcher, tap a program, and let the blender do the work.
That’s the easiest way to understand how to use a Ninja blender with a touch screen without overthinking it.
When I first started, I treated the screen like a control panel on a car. It looks busy, but it’s actually simple once you know what each icon does. The touch screen only shows the options that make sense for the pitcher you’re using, which keeps things clear and stress-free. This design is why many people find learning how to use a Ninja touch screen blender easier than older models.
Understanding the Touch Screen Menu
Auto-iQ for hands-off blending, manual speeds for control, and Pulse for quick bursts.
Once you see this, the menu clicks instantly.
Auto-iQ programs are the “set it and forget it” option. You tap Smoothie, Frozen Drink, or Puree, and the blender changes speed on its own. I use this when I’m busy or distracted because it gives consistent results every time.
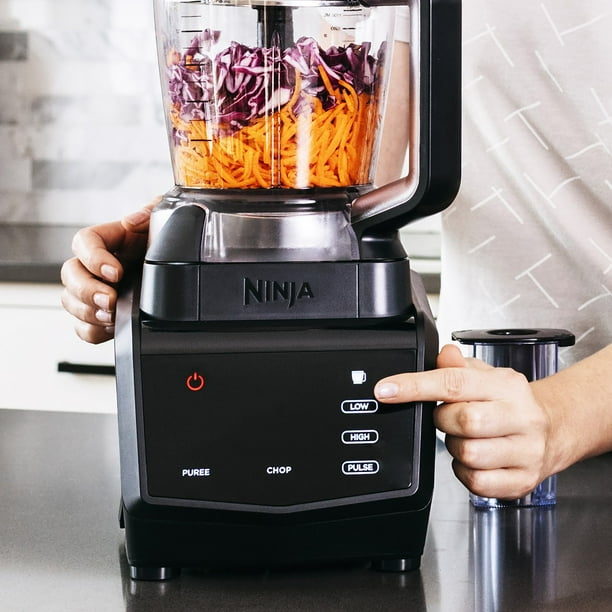
Manual speed controls are for days when you want more control. You choose low or high and stop when it looks right. I like manual mode for soups or sauces where texture matters more than timing.
Pulse is your quick-tap tool. It blends only while you hold it down, which is perfect for chunky salsa or breaking up frozen fruit. If you’re learning how to use a Ninja blender with a touch screen, Pulse helps you feel in control fast.
My Real-Life Tips for First-Time Users
 Start simple, don’t overfill, and trust the presets.
That mindset makes learning how to use a Ninja blender touch screen much easier.
The most common mistake I see is overloading the pitcher. It’s tempting to cram everything in, but Ninja blenders work best when ingredients have room to move. I learned this the hard way after my first smoothie stalled halfway through. Less food and a little liquid go a long way.
For smoothies, I always use the Auto-iQ Smoothie program first. It’s the safest starting point when you’re figuring out how to use a Ninja touch screen blender. Frozen drinks work best with the Frozen Drink preset, while Puree is perfect for soups and baby food. These presets are tuned to stop before over-blending.
Another tip is to resist tapping buttons too fast. The touch screen responds better to calm, single taps. Once I slowed down, everything felt smoother. If you’re new to using a Ninja blender with touch screen, patience makes the whole experience feel effortless.
Yes – Ninja blenders are built to crush ice with ease.
From my own use, ice is one of the things a Ninja Blender touch screen handles best, not worst.
Blade Design and Motor Power (Why Ice Isn’t a Problem)

Sharp, stacked blades plus strong motors make ice easy work.
Ninja blenders use stacked blade columns instead of one flat blade, which matters more than people think.
When I first crushed ice, the sound surprised me – in a good way. It wasn’t a strained grind. It was fast and confident. Most Ninja touch screen models run between 1,000 and 1,400 watts, which is plenty for ice, frozen fruit, and thick smoothie bowls.
The blades pull ice down into the center instead of letting it bounce around. That design is why you don’t need to babysit the blender or stop to shake things loose.
Ice-Crushing Performance (Real-Life Experience)
Ice turns to snow in seconds, not chunks.
I use ice almost daily, especially in summer, and I’ve never had to pre-crack or baby it.
Whether it’s cocktail ice, freezer ice trays, or big cubes, the blender handles them without stalling. The first time I made frozen margaritas, I expected uneven chunks. Instead, I got smooth, slushy perfection. That’s when I fully trusted Ninja’s ice performance.
The key is adding a little liquid. Even a splash of juice or water helps the blades grab faster and keeps things moving smoothly.
Best Presets for Ice and Frozen Ingredients
Use “Frozen Drink” or “Ice Crush” presets-don’t guess.
These programs are tuned specifically for ice-heavy blends.
The ninja auto iq touch screen blender presets, pulse, and change speeds automatically. That prevents overheating and avoids leaving ice chunks behind. Frozen Drink is my go-to for smoothies, slushies, and protein shakes with ice.
If your model has an Ice Crush button, use it confidently. Ninja designed these presets for real-world use, not gentle testing. As long as the pitcher is locked and ingredients aren’t overfilled, ice is never an issue.
If ice-heavy drinks are part of your routine, this is one area where a Ninja truly shines.

Ninja Blender Touch Screen vs Vitamix (Honest Comparison)
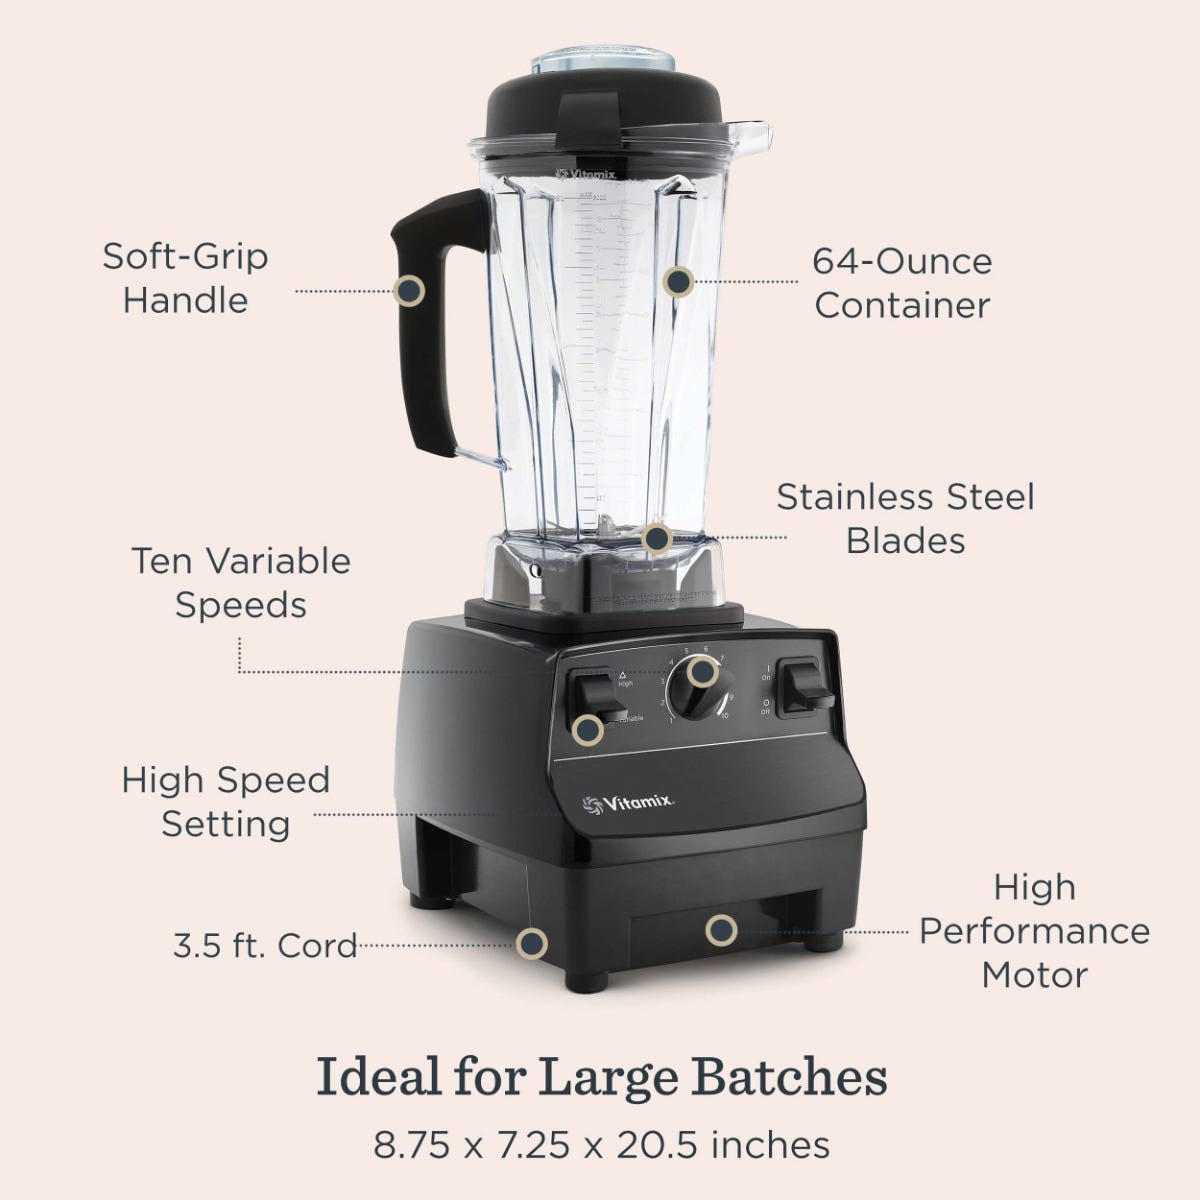
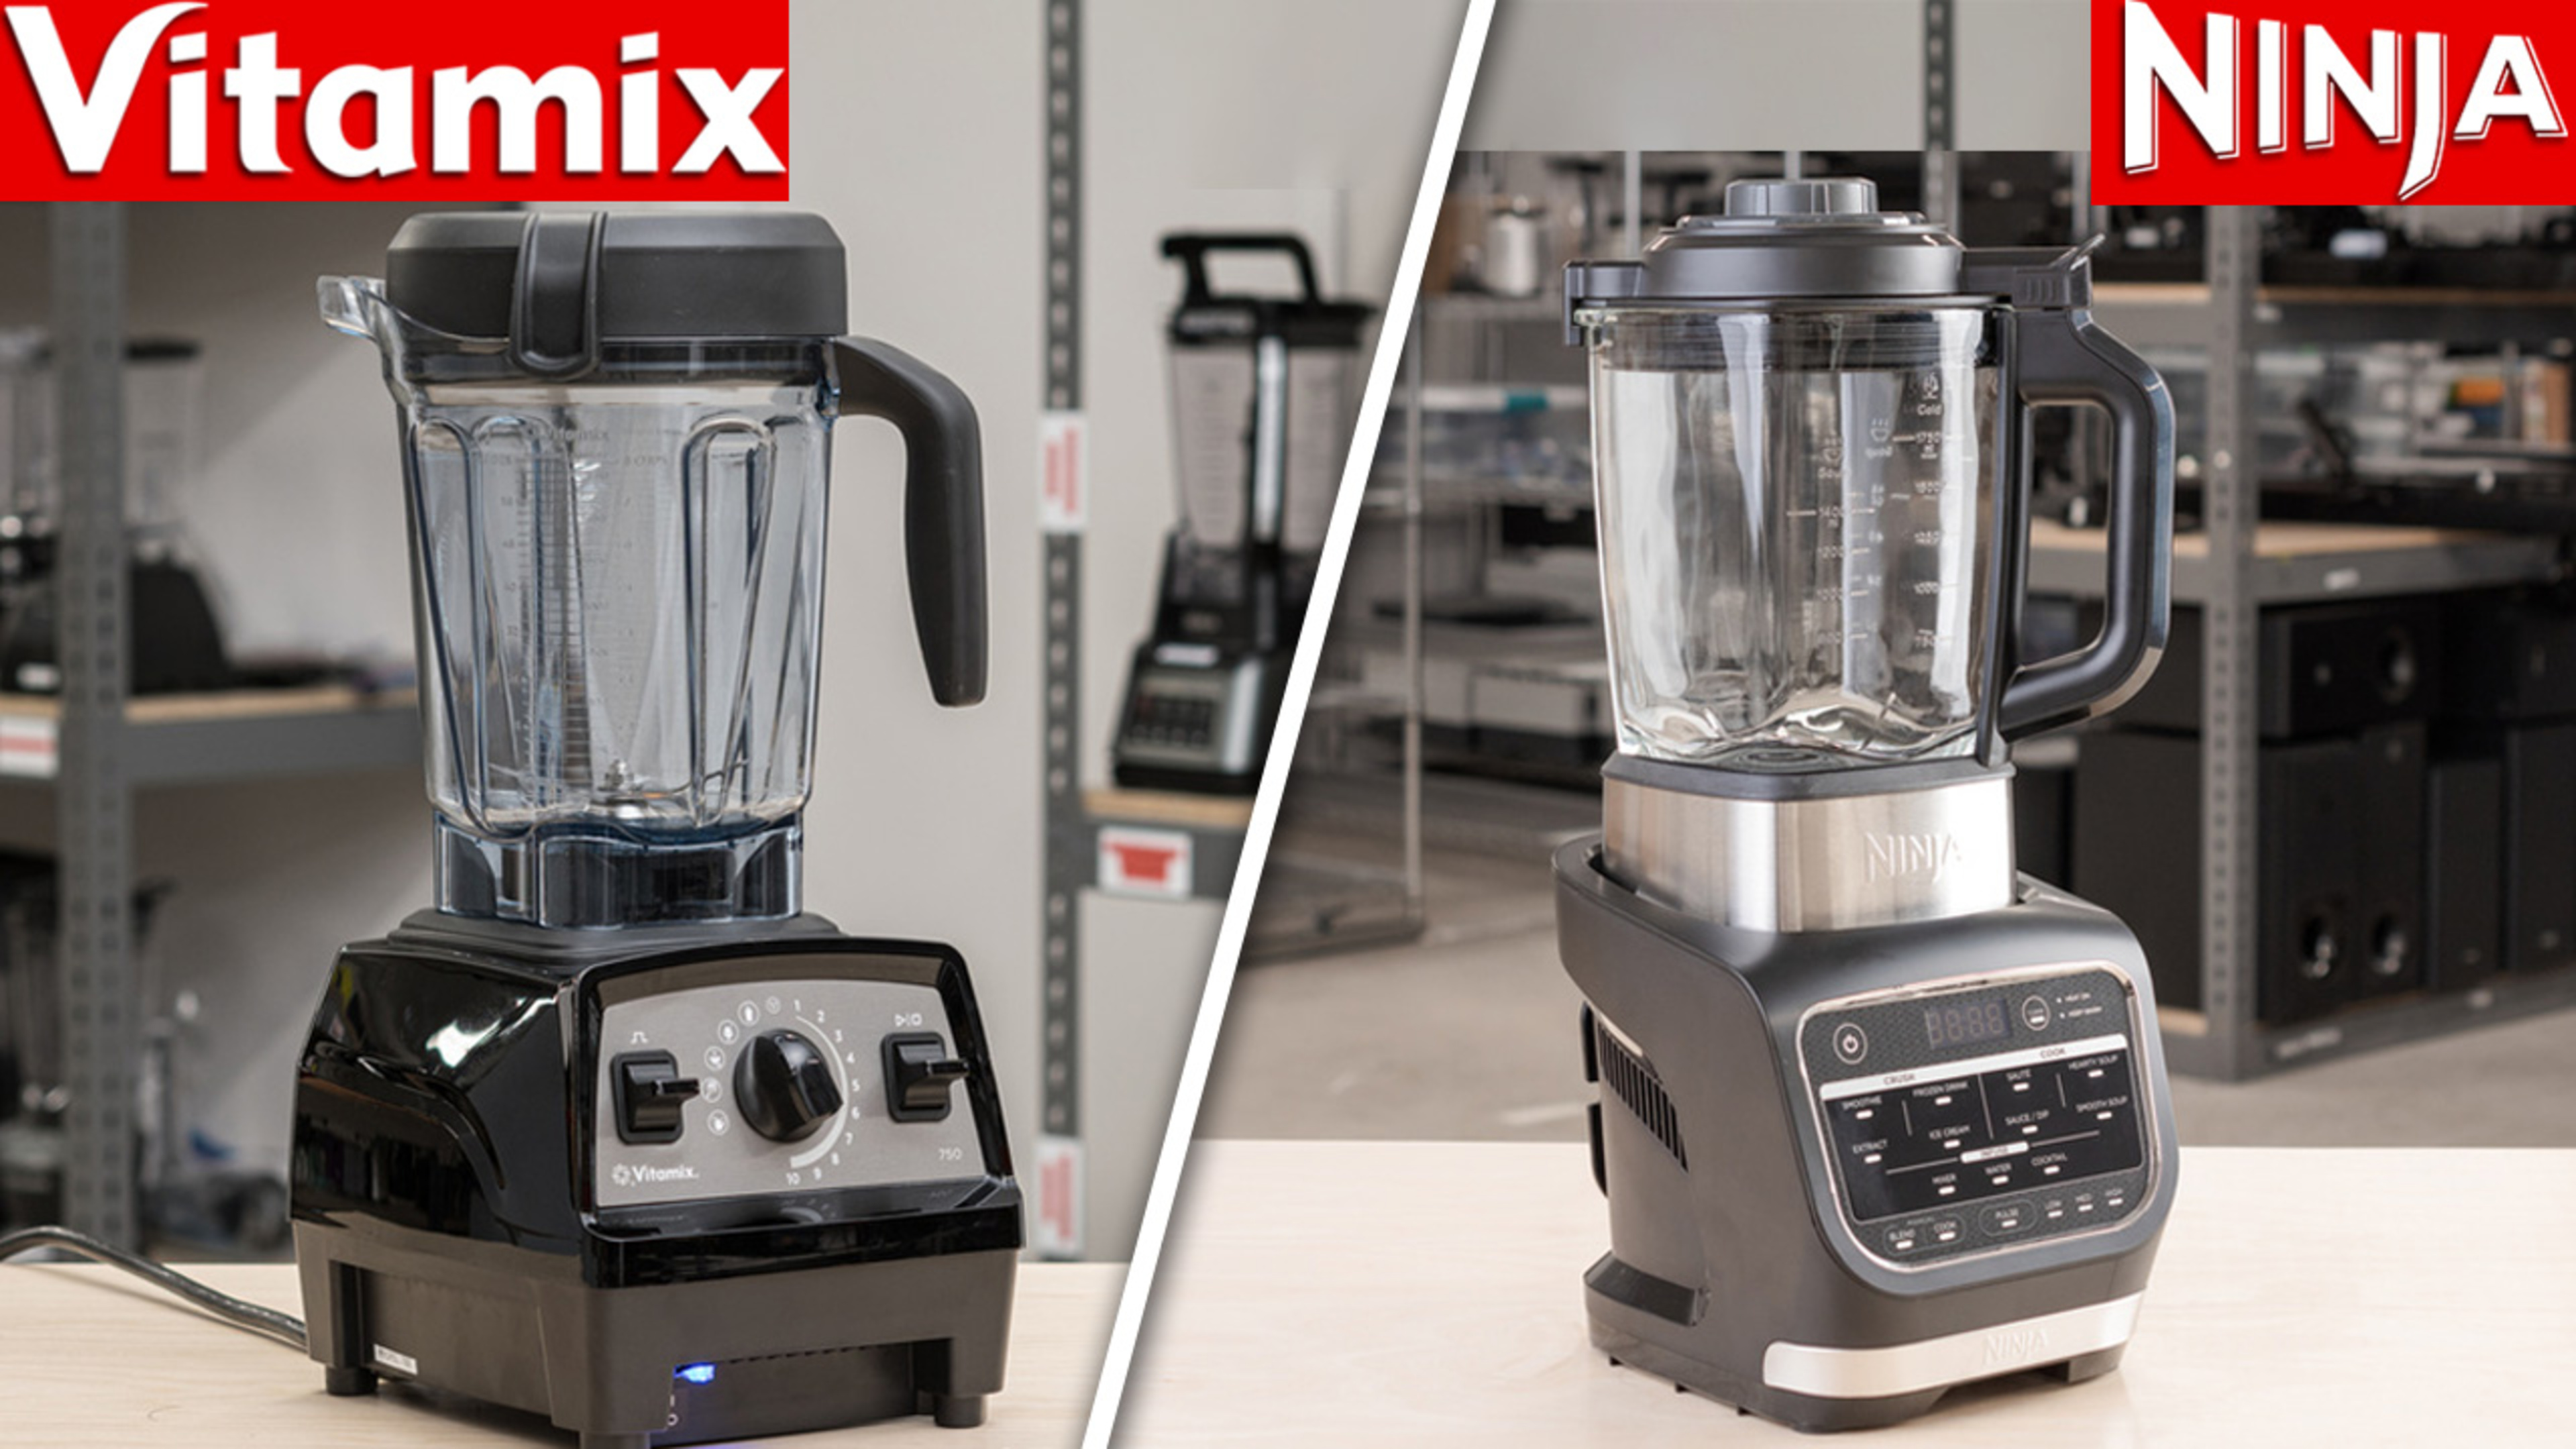
Ninja wins on ease and price, Vitamix wins on raw power and longevity.
I’ve used both, and they feel like two different personalities in the kitchen.
Performance
Vitamix is stronger, Ninja is smarter.
Vitamix blenders have insanely powerful motors that can heat soup and pulverize anything. But in daily life, I didn’t need that much muscle. A Ninja blender with a touch screen handled smoothies, ice, and sauces just fine.
Ninja’s Auto-iQ programs also remove guesswork. I press one button and walk away. With Vitamix, I had to stand there and adjust the dial.
Price vs Value
Ninja gives more features for less money.
Vitamix blenders are expensive, often double the cost of a Ninja touch screen model.
That price makes sense if you blend professionally or daily in large batches. For most home kitchens, Ninja offers better value. You get presets, a touch screen, and often multiple attachments for less.
Ease of Use
Ninja is easier for beginners.
Touch screen controls feel familiar, like using a phone.
Vitamix uses manual dials, which some people love. I found them powerful but less forgiving. Ninja feels friendlier, especially if you just want fast results without learning curves.
Touch Screen vs Manual Dials
Touch screen is calmer, dials are more hands-on.
If you like control and tweaking, Vitamix is your style.
If you want results without thinking, Ninja’s touch screen wins. I reach for Ninja on busy mornings and Vitamix only when I want to experiment.
Who Should Choose Which Brand?
Choose Ninja for convenience, Vitamix for control.
Busy families, beginners, and budget-minded buyers fit the Ninja better.
Serious cooks and blending purists may prefer Vitamix. Neither is wrong—it’s about how you cook, not brand hype.
Ninja Blender Touch Screen at Costco – Is It Worth It?


Yes – Costco is one of the best places to buy Ninja.
I’ve bought Ninja blenders there myself, and the value is hard to beat.
Pricing Expectations
Lower prices, bigger bundles.
Costco often sells Ninja touch screen models for less than other stores.
You usually get extra pitchers or attachments included. That alone can save serious money.
Bundles and Exclusive Models
Costco versions often include bonuses.
Some Ninja models sold at Costco aren’t available elsewhere.
These bundles are great if you want a full setup without piecing parts together later. I prefer this route because it feels complete from day one.
Warranty Considerations
Costco’s return policy adds peace of mind.
Even if Ninja’s warranty is standard, Costco’s return window is generous.
That safety net matters with electronics. It’s one reason I recommend Costco for big kitchen buys.
Common Problems & Fixes


Most problems are small and fixable.
I’ve panicked before – only to realize the issue was simple.
Ninja Blender Touch Screen Won’t Work
It’s usually a safety lock issue.
First, check that the pitcher is locked all the way.
No lock, no power. That design is intentional. If the screen stays dark, unplug the blender for 30 seconds and try again.
If it still doesn’t respond, clean the base contacts. Food splashes can interfere with touch sensitivity.
What Do the 3 Lines on the Ninja Touch Screen Mean?
It’s an error or safety warning.
Three lines usually mean the blender isn’t assembled correctly.
Remove the pitcher, reseat it firmly, and restart. This fixes it most of the time. If the lines return repeatedly, that’s when I contact support.
Bottom line:
Ninja touch screen blenders shine because they reduce friction—less thinking, less cleaning, less frustration. Whether you’re comparing brands, buying at Costco, or fixing a small issue, the goal is the same: a blender that fits your real life, not a showroom fantasy.
How to Add or Replace a Touch Screen in a Blender (Reality Check)
No – it’s not practical or safe.
I get why people ask, “How to add a screen in Blender?” I wondered the same thing when my old button blender felt ancient. But after digging in (and talking to repair techs), I learned this is one of those ideas that sounds easier than it is.
Is It Possible to Add or Replace a Touch Screen?
Technically yes, realistically no.
A blender touch screen isn’t just a screen. It’s tied to sensors, safety locks, and software inside the base. I once opened a broken unit out of curiosity, and it looked more like a mini computer than an appliance.
Trying to retrofit a screen means rewiring controls and bypassing safety systems. That’s risky. Even if it turns on, it may not shut off when it should.
Why Manufacturers Don’t Recommend It
Safety and reliability come first.
Brands like Ninja design touch screens as part of a sealed system. The screen talks to the motor, pitcher lock, and presets all at once.
If one piece is changed, the whole system can fail. That’s why manufacturers won’t sell replacement screens for DIY installs. From experience, this isn’t them being difficult—it’s them avoiding accidents.
Better (and Smarter) Alternatives
Replace the blender, not the screen.
If your touch screen stops working, the safest move is warranty service or replacement. I tried to “fix” an old blender once and spent more money than a new model would’ve cost.
If you want touch screen features, buying a blender built for it from day one is the better path. You get safety, presets, and peace of mind – without turning your kitchen into a repair shop.
Bottom line:
Adding a touch screen to a blender is like putting a tablet on a toaster. It looks clever, but it’s not how the appliance works. If you want the touch screen experience, start with a blender designed for it. That choice saves time, money, and stress.


")